How to Create a USB Block Policy Using Microsoft Intune
- Tek Doyen
- Jun 18, 2024
- 1 min read
Updated: Aug 14, 2024
To create a USB block policy using Microsoft Intune, you can follow these steps:
Sign in to the Microsoft Endpoint Manager admin center:
Go to https://endpoint.microsoft.com and sign in with your admin credentials.
Navigate to Endpoint security:
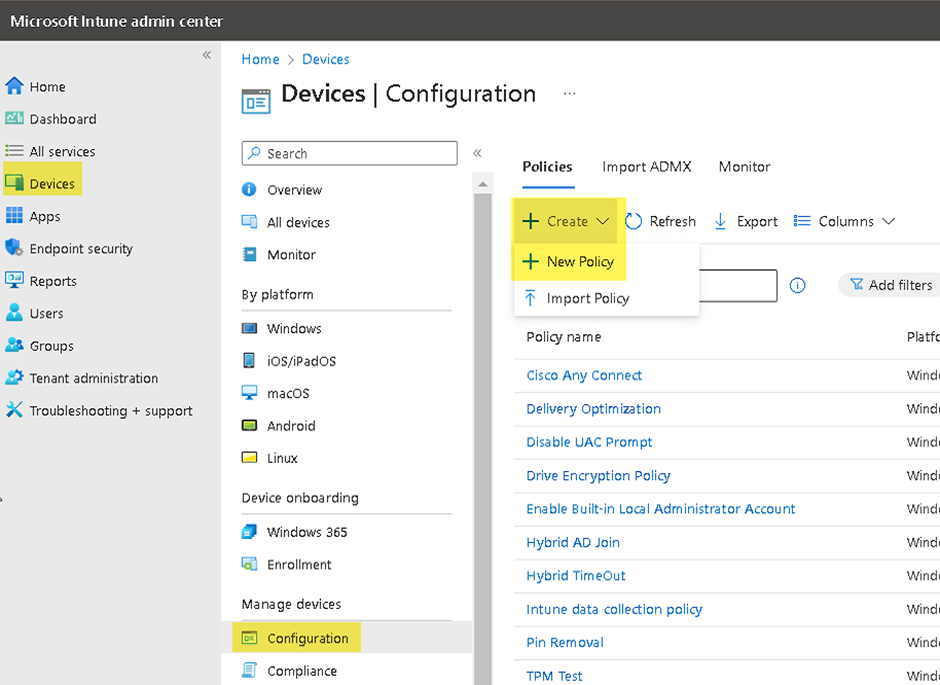
In the Microsoft Endpoint Manager admin center, go to "Devices" > "Configuration" > "+ Create > +New Policy".
3. Selec platform and profile:
Choose the platform (Windows 10 and later) and Profile Type (Templates) for which you want to create the USB block policy. This could be Windows 10 or later.
Click on "Create profile" and select the platform appropriate for your devices.
4. Configure settings:
Once clicked on "Create" wizard will start, here enter the Policy Name, and click next.
5. Configure USB block policy:
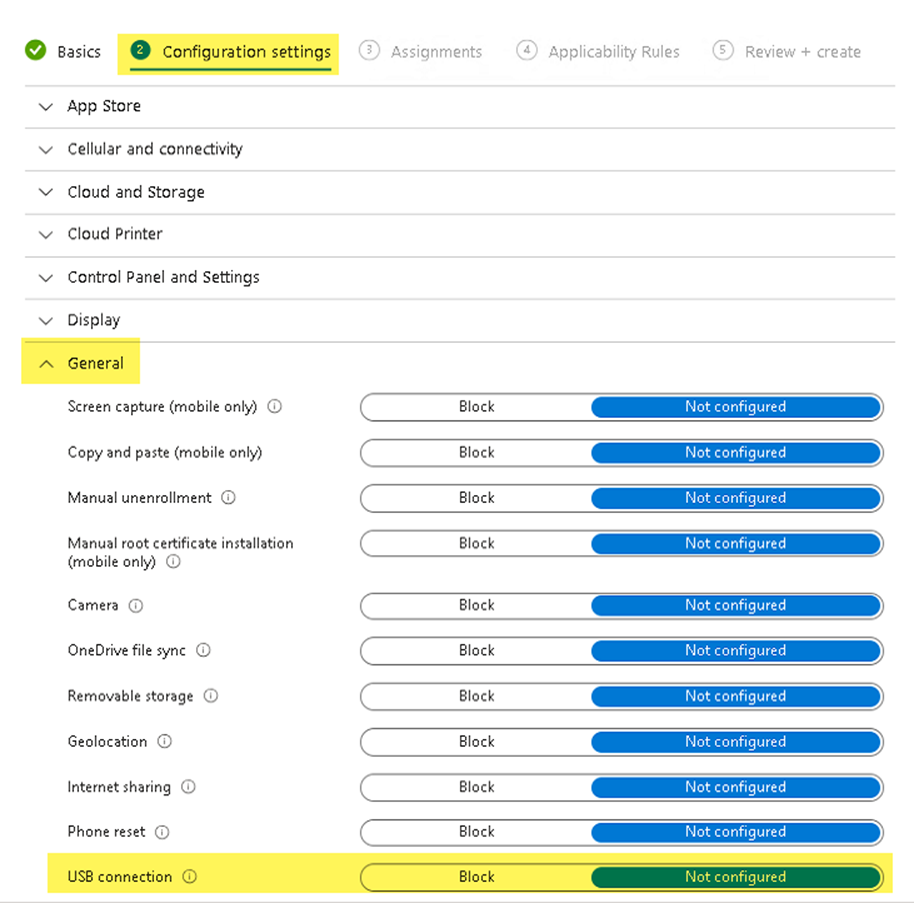
One the next screen you will see the “configuration Settings”. Here click on General and click on “Block” against USB Connection.
· Once selected, the above options click Next.
6. Assign the policy:
After configuring the USB block policy, proceed to assign it to the appropriate device groups within your organization.
You can choose to assign it to all devices, specific groups, or individual devices based on your organizational needs.
7. Review and create:
Review the settings you've configured to ensure they align with your organization's security policies.
Once you're satisfied, click "Create" to create the USB block policy.
8. Monitor and troubleshoot:
After the policy is created and assigned, monitor its deployment to ensure its effectively blocking USB devices as intended.
If any issues arise, use the Intune console to troubleshoot and make necessary adjustments to the policy.


Comments